Are you looking to add some aquatic artwork to your collection? Drawing a fish can be a fun and creative way to showcase your artistic skills. Whether you are a beginner or an experienced artist, this step-by-step guide will help you create a beautiful fish drawing with ease.
Before you begin, gather your drawing supplies such as paper, pencil, eraser, and colored pencils or markers. Find a comfortable and well-lit workspace where you can focus on your drawing without any distractions. Now, let’s dive into how to draw a fish!
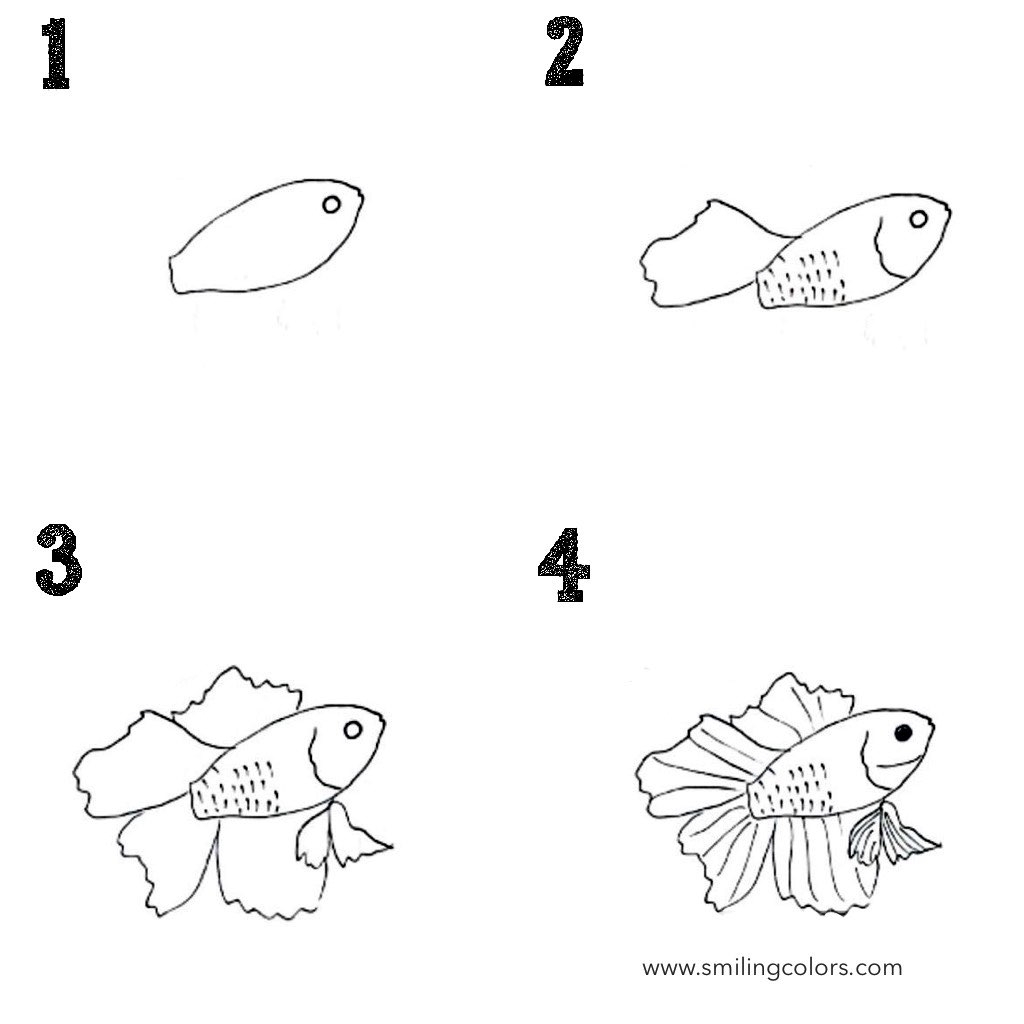
Step 1: Start with the Body
Begin by drawing an oval shape for the body of the fish. This will serve as the foundation for your drawing. Next, sketch a triangle shape at one end of the oval to create the tail of the fish. Make sure to leave some space at the other end for the head.
Step 2: Add Details
Once you have the basic outline of the fish, it’s time to add some details. Draw a small circle for the eye near the front of the fish’s body. Then, sketch a curved line from the eye to the top of the body to create the fish’s mouth. Add fins on the top and bottom of the body for a more realistic look.
Step 3: Color the Fish
Now that you have completed the outline and added details, it’s time to bring your fish to life with color. Use your colored pencils or markers to fill in the body of the fish with vibrant shades of blue, green, or orange. Add some shading to create depth and dimension to your drawing.
Step 4: Final Touches
Once you have colored your fish, take a step back and admire your artwork. If there are any areas that need touch-ups, use your eraser to make corrections. Add some bubbles or seaweed around the fish to create a more underwater scene.
In conclusion, drawing a fish can be a fun and rewarding experience for artists of all levels. By following these simple steps, you can create a beautiful fish drawing that will impress your friends and family. So grab your drawing supplies and start creating your very own fish masterpiece today!
