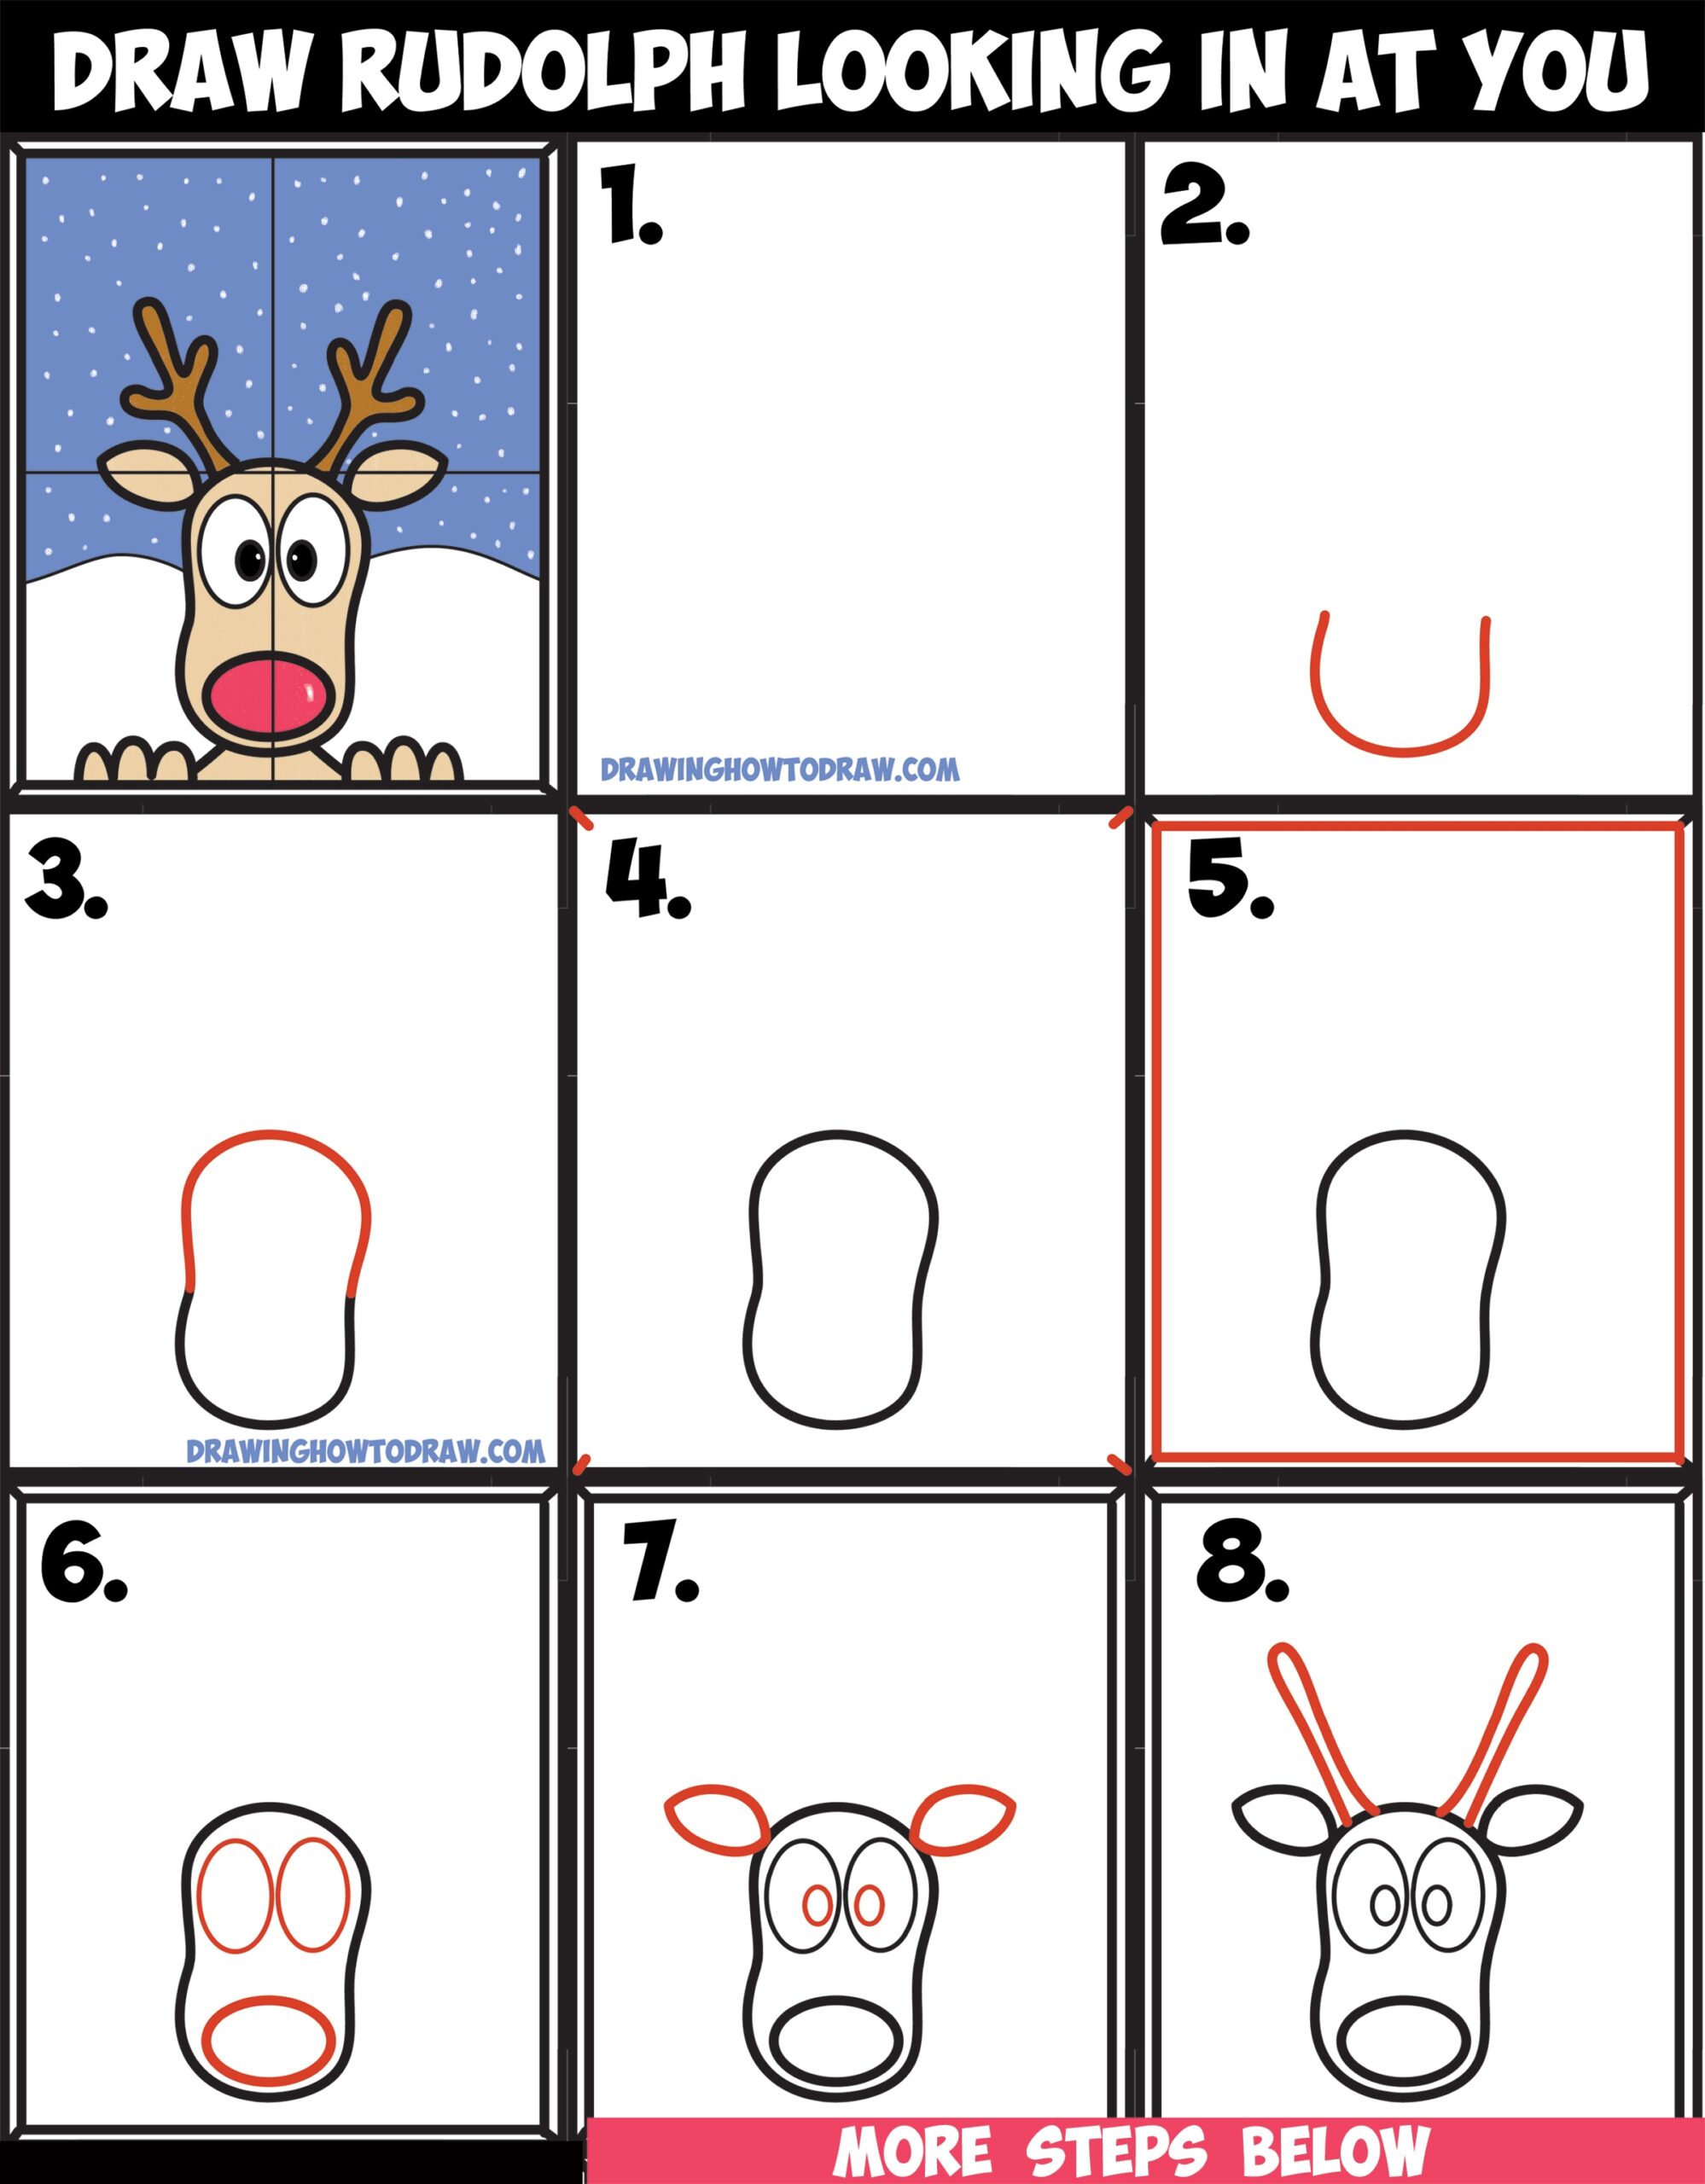
When it comes to Christmas, one of the most beloved characters is Rudolph the Red-Nosed Reindeer. Drawing Rudolph can be a fun and festive activity that can bring holiday cheer to anyone who sees your creation.
With just a few simple steps, you can learn how to draw Rudolph and add him to your holiday artwork collection. So grab your pencils and paper, and let’s get started!
Step-by-Step Guide:
1. Start by drawing a large oval for Rudolph’s head. Add two small circles for his eyes and a smaller oval for his nose, which should be bright red to represent his glowing nose.
2. Next, draw two curved lines on top of his head for his antlers. Add branches to the antlers by drawing small lines branching out from the main lines.
3. Then, draw Rudolph’s ears on each side of his head. They should be small and slightly pointed, similar to a deer’s ears.
4. After that, draw a big smile below his nose to give Rudolph a friendly expression. Add some curved lines for his cheeks to make him look even more cheerful.
5. Finally, draw Rudolph’s body by adding a large oval shape underneath his head. Connect the head and body with two curved lines to create his neck.
6. Once you have completed the basic outline of Rudolph, you can add more details such as fur texture, shading, and any additional decorations like a Santa hat or a jingle bell collar.
7. To finish off your Rudolph drawing, go over your lines with a darker pencil or pen to make them stand out. You can also color him in using crayons, markers, or colored pencils to bring him to life.
Now that you have followed these steps, you should have your very own Rudolph drawing ready to display or give as a festive gift to someone special. Drawing Rudolph can be a fun and creative way to celebrate the holiday season and spread joy to those around you.
So, gather your art supplies and start creating your own Rudolph masterpiece today!
