Snowflakes are beautiful and intricate designs that form when water vapor freezes. Drawing a snowflake can be a fun and creative activity, especially during the winter season. Whether you’re a beginner or an experienced artist, creating your own unique snowflake can be a rewarding experience.
Before you begin drawing your snowflake, gather all the necessary materials such as paper, a pencil, an eraser, and a ruler. Choose a quiet and comfortable space where you can focus on creating your masterpiece. Now, let’s explore how you can draw a snowflake step by step.
Step by Step Guide:
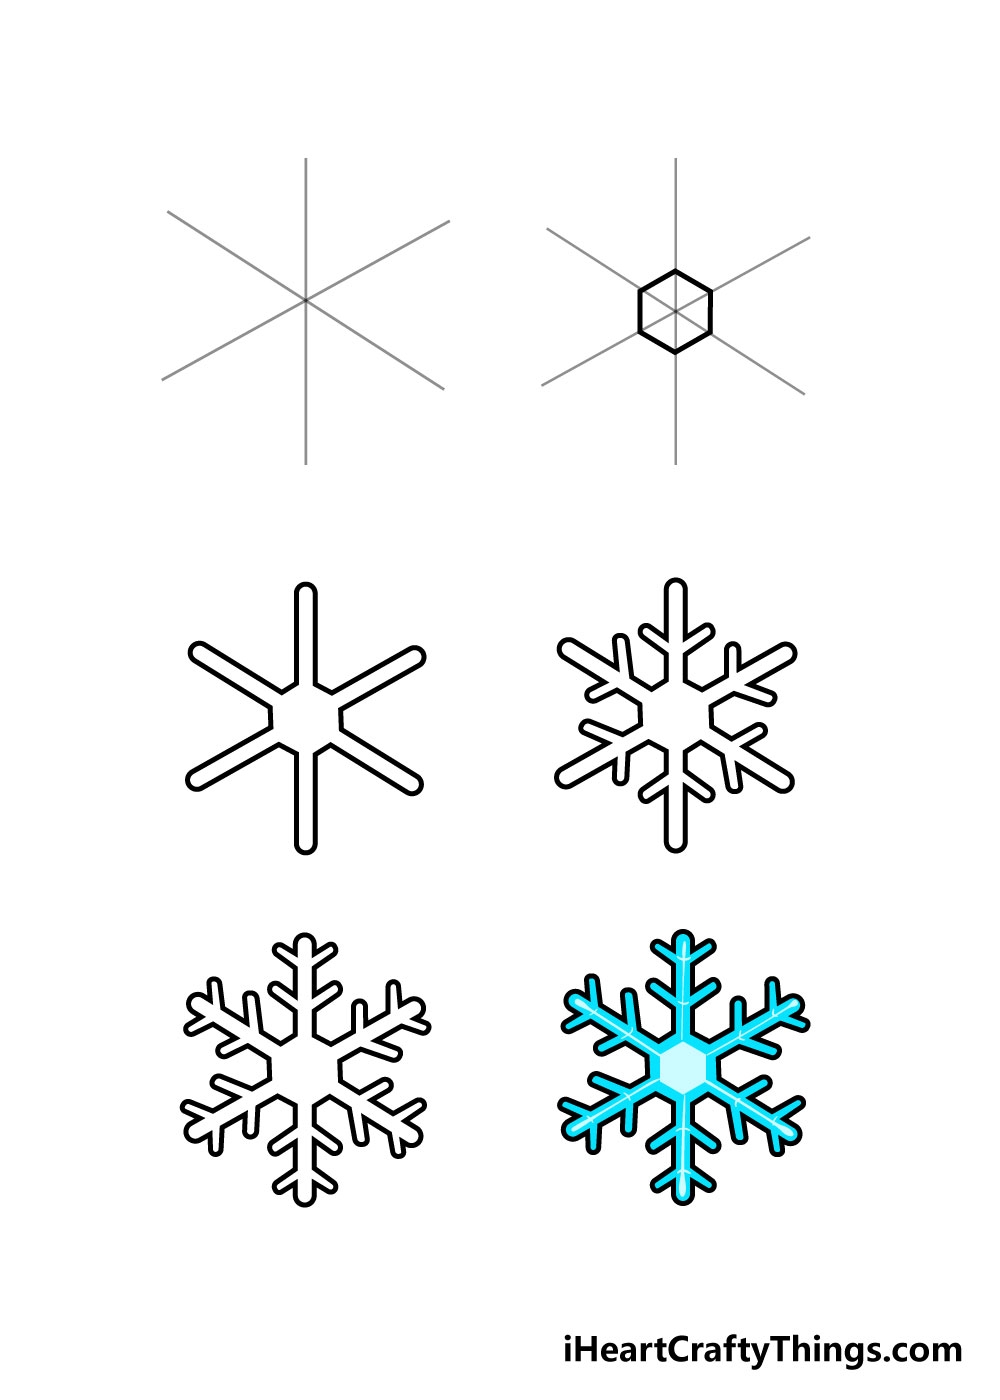
1. Start by drawing a small circle in the center of your paper. This will serve as the core of your snowflake.
2. Next, draw six straight lines extending outwards from the circle, like spokes on a wheel. These lines will form the basic structure of your snowflake.
3. Now, add smaller lines branching off from the main lines to create the intricate patterns of the snowflake. Be creative and experiment with different shapes and designs.
4. Repeat this process on each of the six main lines, making sure to keep the symmetry of the snowflake intact. Remember, no two snowflakes are alike, so feel free to add your own personal touch.
5. Once you’re satisfied with the design, go over the lines with a pen or marker to make them more defined. Erase any remaining pencil marks to reveal your finished snowflake.
6. To add a finishing touch, consider adding glitter or metallic accents to make your snowflake sparkle and shine like a real snowflake.
In conclusion, drawing a snowflake can be a fun and creative activity for artists of all skill levels. By following these simple steps and letting your imagination run wild, you can create a beautiful snowflake design that is uniquely yours. So, grab your art supplies and start drawing your own winter wonderland!
